DKIM (DomainKeys Identified Mail) zapis nam služi da nas uveri da sadržaj i naslov maila nisu menjani u saobraćaju od pošiljaoca do primaoca. Ovaj zapis koristi asimetričnu enkripciju, tačnije 2 ključa, jedan javni koji može da vidi svako ko je primio mail od pošiljaoca i privatni ključ koji se nalazi na serveru pošiljaoca. Privatni ključ se koristi za enkripciju, a javni za dekripciju.
Da bi bolje razumeli DKIM zapise bitno je znati osnovne tagove koji se u njemu koriste:
- s -- Selektor koji govori ime zapisa koji se koristi,
- d -- Domen koji se koristi i zajedno sa selektorom govori kako da se nađe javni ključ i
- p -- Javni ključ koji se objavljuje kao deo zapisa.
Primer kako izgleda DKIM zapis:
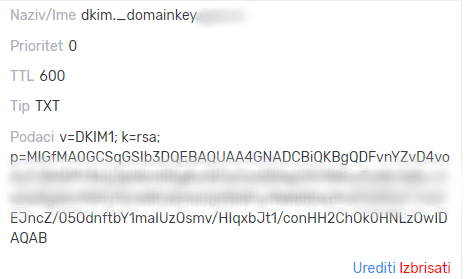
Napomena:DKIM zapis se generiše na serveru i samo generisanje zapisa varira od tipa servera/panela koji se koriste.
Da dodate DKIM zapis u Vašu zonu, potrebno je da se uloguejte u Vaš mCloud portal i kliknete na mDNS koji se nalazi pod odeljkom Moje usluge:

Kliknite na dostupnu opciju AnyCast i tu ćete videti već dodate domene ako ih imate i dugme da dodate novi domen:

Kliknite na domen za koji želite da dodate DKIM zapis i prikazaće Vam se zonski zapisi koji postoje. U desnom delu ćete imati opciju za dodavanje novih zapisa:

Za tip zapisa odaberite TXT i kliknite na dugme Dodati pa će se otvoriti prozor za unošenje zapisa:

U deo Naziv/Ime dodaje naziv selektora (prilikom generisanja DKIM zapisa dobićete/kreiraćete selektor), a u Content ćete staviti ostatak zapisa koji je generisan. Kliknite na Pošalji i zapis će biti sačuvan.