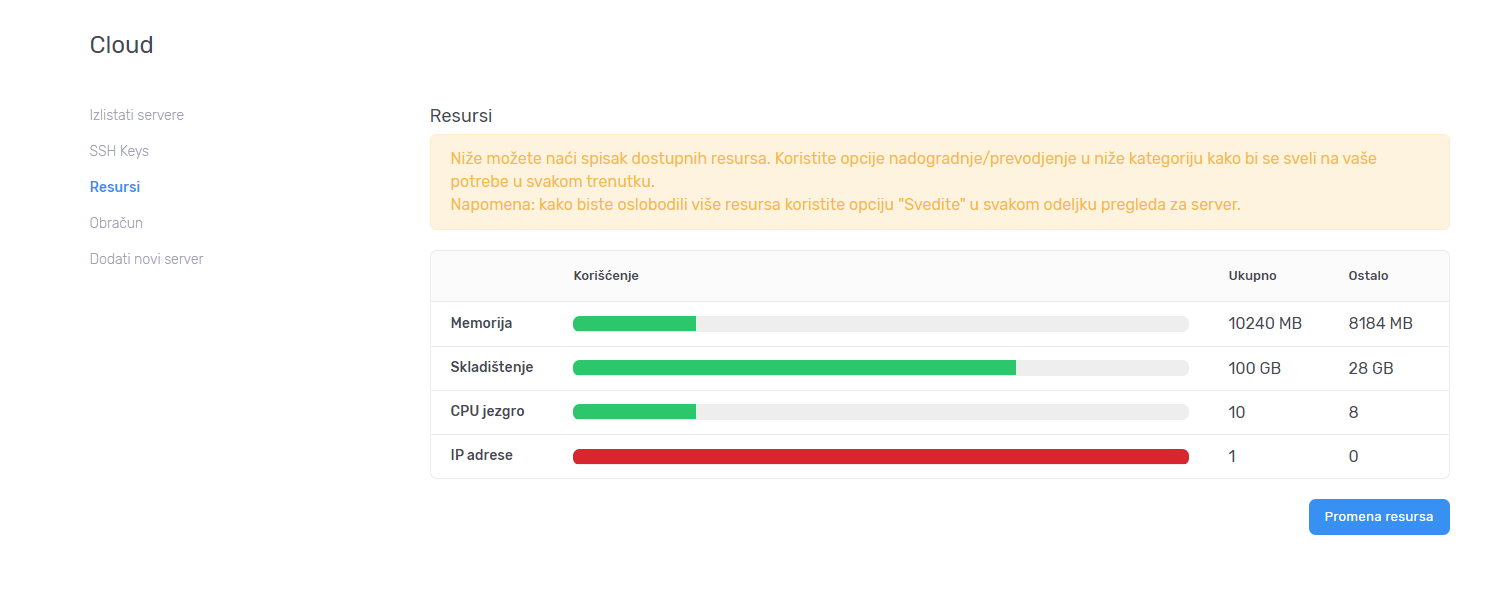
Povećanje diska na bilo kom serveru u okviru Data Centra možete samostalno uraditi. Za početak proverite koliko resursa imate na raspolaganju u okviru vašeg Data Centra. Ovo možete proveriti u odeljku Resursi vašeg Data Centra:

Ukoliko nemate dovoljno slobodnog diska na raspolaganju u Data Centru možete zakupiti dodatni disk prema ovom uputstvu.
Proširenje diska možete odraditi tako što ćete odabrati željeni serveru Data Centru klikom na njegov hostname:

Potom, sa leve strane odaberite Skladištenje -> Diskovi:

Ovde je potrebno kliknuti na dugme Urediti pred željenog diska.
Napomena: Pre povećanja diska, preporuka je da napravite backup servera. Povećanje diska izaziva prekid u radu servera od 10 do 30 minuta.
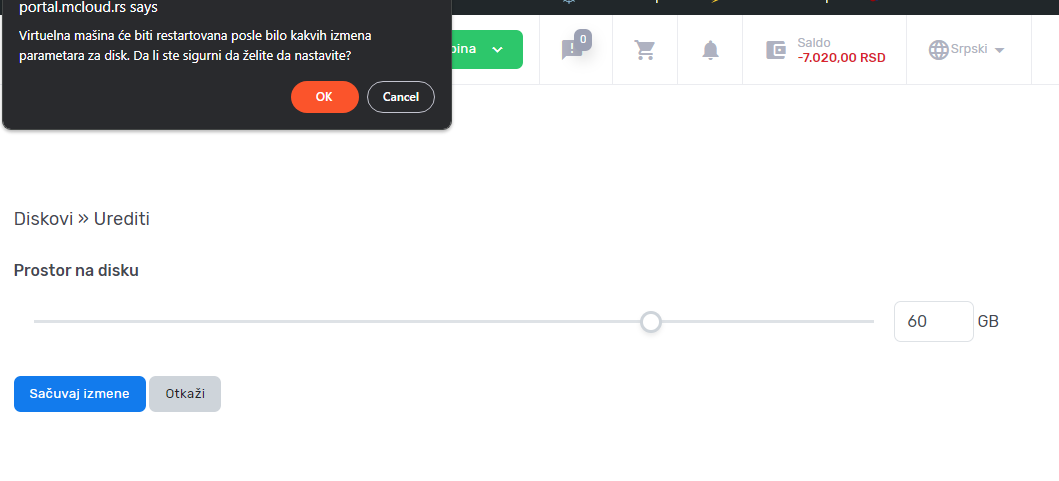
Sada će vam se prikazati "slajder" i sa desne strane ćete imati polje za unos gde možete upisati novu veličinu diska.

Nakon što kliknete na dugme Save Changes pojaviće se pop-up prozor u kom je potrebno da potvrdite da želite da povećate disk:

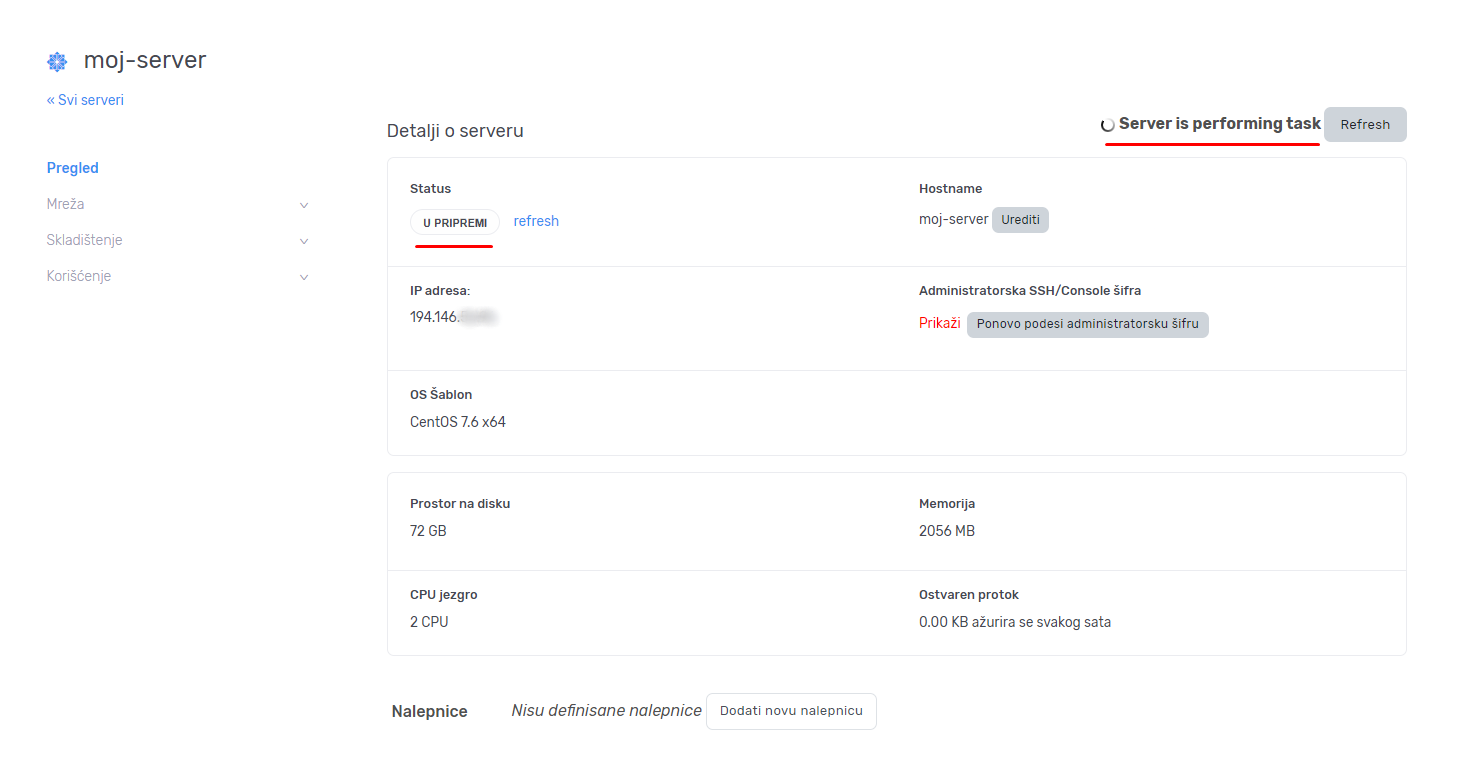
Dok se ne završi povećanje diska pisaće da je disk zaključan, a server u statusu pripreme:


Nakon što se disk poveća, status servera će ponovo biti "Uključeno":
