Da biste započeli sa upravljanjem resursima vašeg mServera, uđite u detalje o vašem serveru kao što je opisano ovde i kliknite na dugme Proširenje.
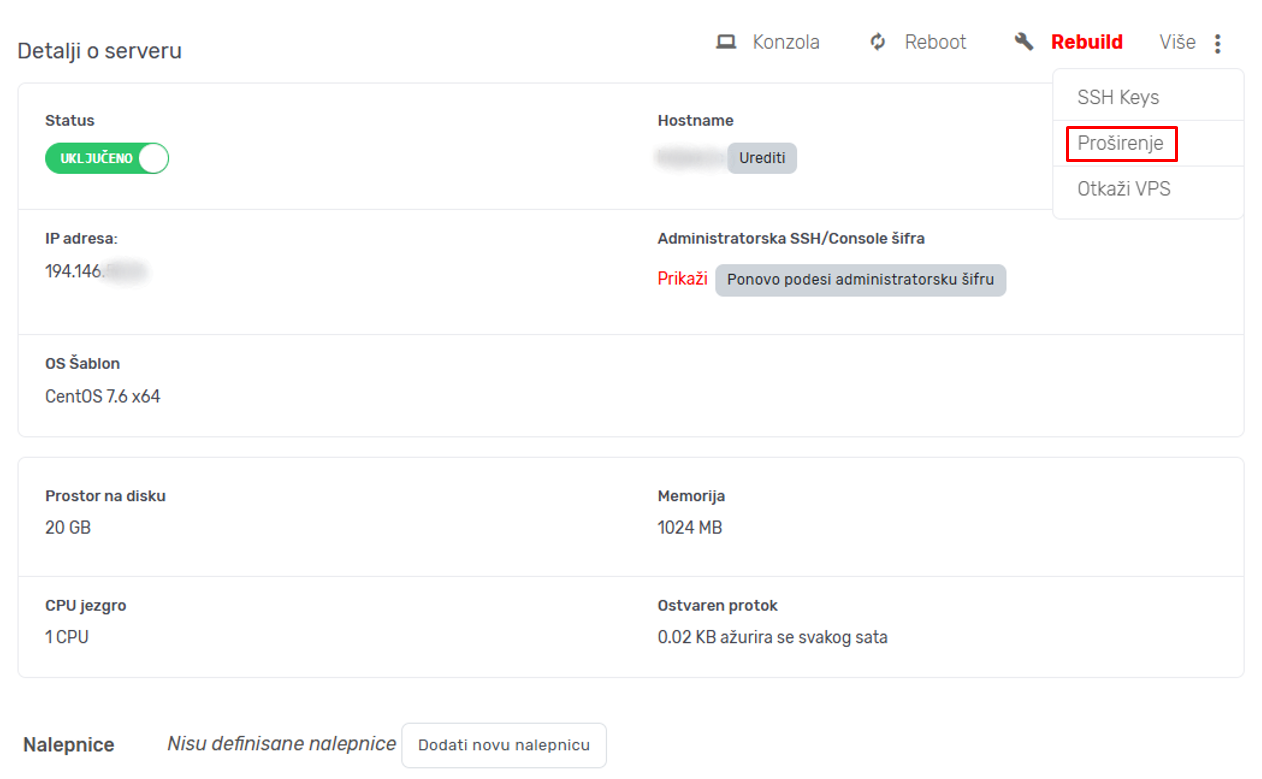
Kliknom na Proširenje u padajućem meniju Više dobijate sledeću stranicu:
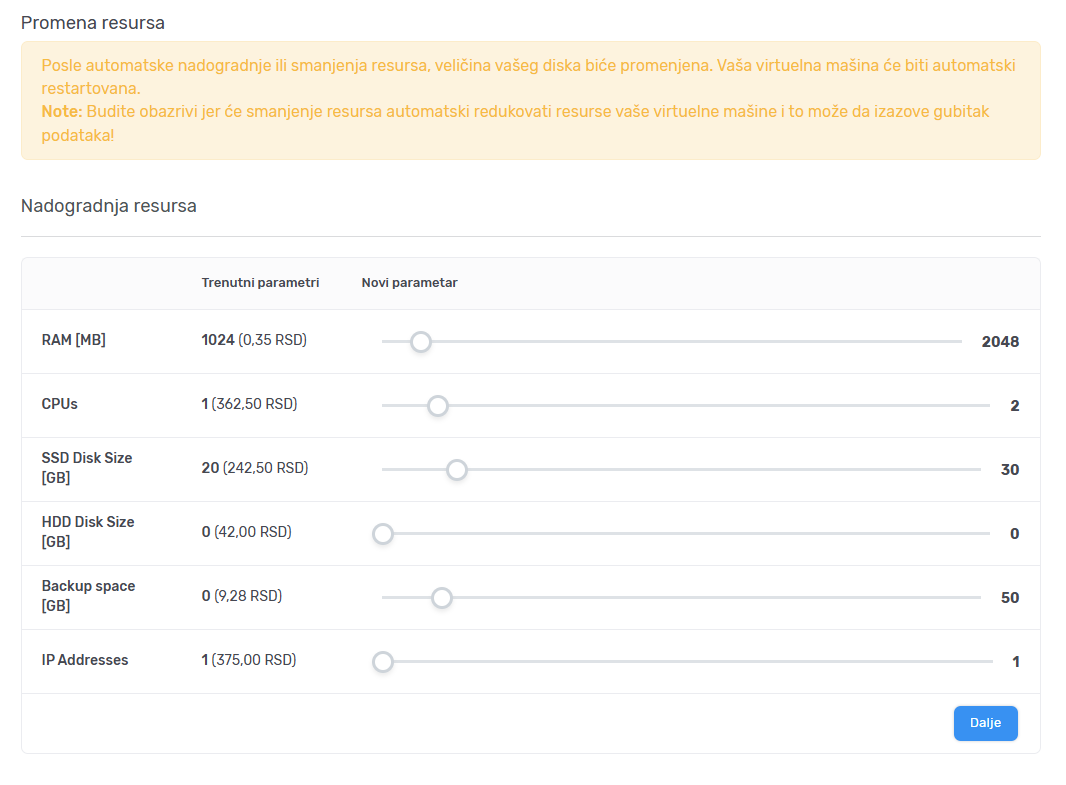
Unutar ove strane možete da upravljate sledećim resursima:
- RAM - opcija za povećavanje ili smanjivanje RAM memorije
- CPU - opcija za povećavanje ili smanjivanje broja procesorskih jezgara
- SSD Disk size - opcija za povećavanje količine prostora na SSD-u
- HDD Disk size - opcija za povećavanje količine prostora na hard disku
- Backup Space - opcija za povećavanje ili smanjivanje prostora za backup disku
- IP Addresses - opcija za povećavanje ili smanjenje broja IP adresa
Da biste promenili bilo koji od parametara pomerite klizač desno (za povećanje) ili levo (za smanjivanje). Nakon što napravite željene izmene, kliknite Dalje kako biste nastavili. U zavisnosti od toga da li ste izabrali da smanjite ili povećate resurse biće vam prikazana ili strana sa informacijom o tome da imate na raspolaganju kredite za trošenje u narednom periodu ili stranica za plaćanje (više o tome u skecijama ispod).
Napomena:Promena će biti automatska za RAM ili CPU nakon izvršene i registrovane uplate. Za više informacija o izmeni prostora na disku pogledajte sekciju ispod Povećavanje prostora na disku.
Slučaj da povećavate resurse
Nakon što povećate resurse, biće vam prikazana stranica za uplatu.
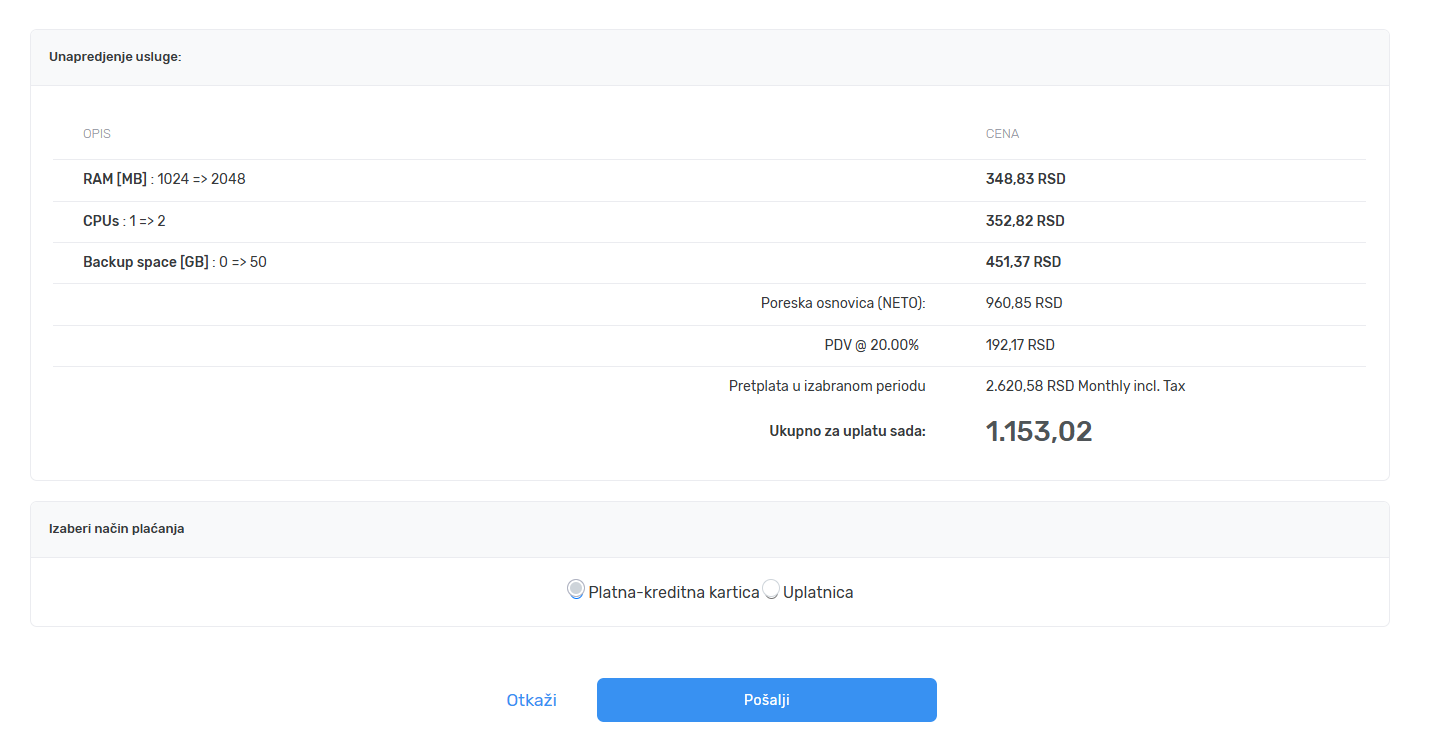
Izaberite željeni način plaćanja i kliknite Dalje da biste završili proceduru za plaćanje (pogledajte sekcije Plaćanje kreditnom karticomrd i Plaćanje uplatnicom.
Slučaj da smanjujete resurse
U slučaju da odlučite da smanjite resurse biće vam prikazana strana koja vas obaveštava da ćete nepotrošena sredstva imati na raspolaganju kao kredit prilikom sledeće uplate.
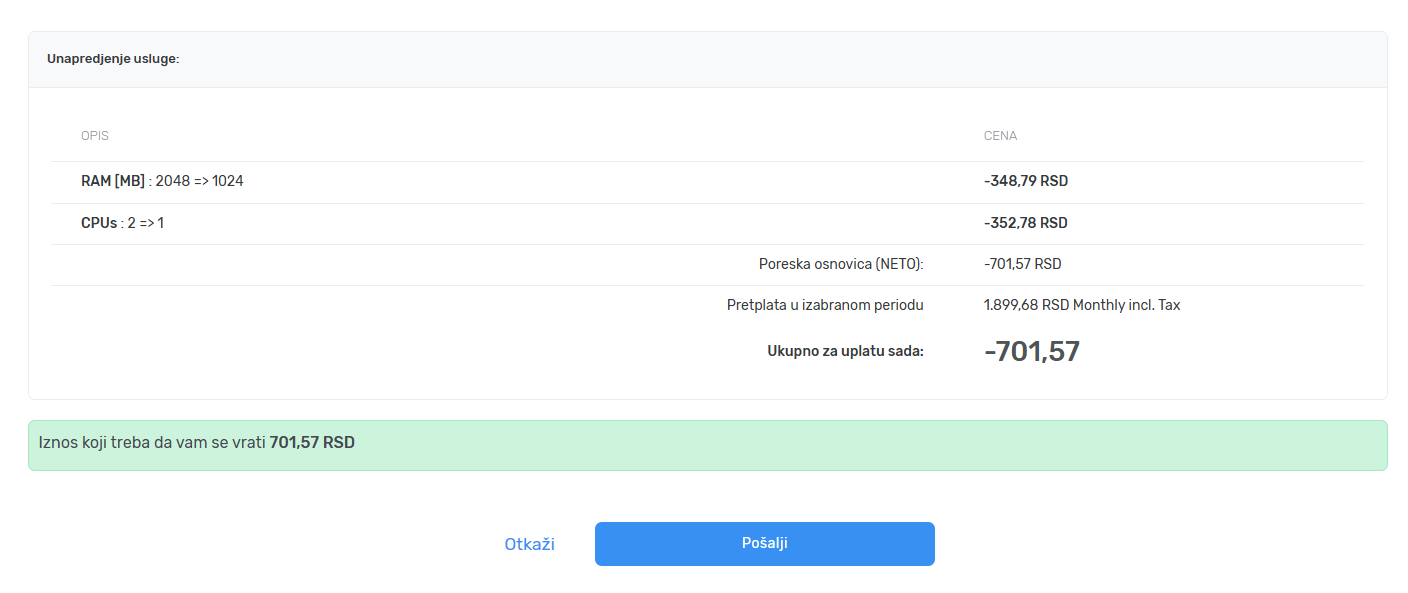
Kliknite Dalje da biste završili proceduru za smanjivanje resursa.
Napomene:
- Sve izmene će odmah biti primenjene.
- Smanjivanje prostora na disku nije moguće. Ukoliko je ovo neophodno kontaktirajte našu podršku.
Povećavanje prostora na disku
Nakon što ste izvršili uplatu za uslugu povećanja prostora na disku, disk se neće odmah automatski povećati, kao što je to slučaj kod CPU i RAM povećanja. Povećanje diska podrazumeva duži downtime, pa je potrebno da povećanje inicirate samostalno u vreme kada ima najmanje aktivnosti na serveru. Da biste pokrenuli povećanje diska, otvorite stranicu svog servera i sa leve strane u podajućem meniju Skladištenje izaberite Diskovi.
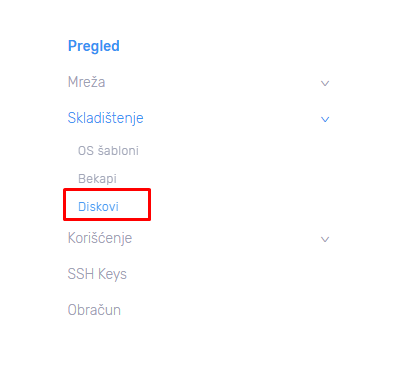
Biće vam prikazana stranica za upravljanje diskovima.

Kliknite Urediti pored diska čiji kapacitet želite da povećate i pojaviće se sledeća stranica:.

Pomerite klizač na desno do željenog kapaciteta diska i kliknite Sačuvaj izmene. Biće vam prikazan prozor za potvrdu u kome treba da kliknete OK.
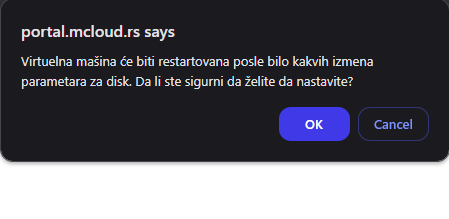
Virtuelna mašina će nakon toga biti restartovana, pa ovu izmenu radite u vreme kada ima najmanje aktivnosti na serveru kome se proširuje disk.